How To Make A Galvanized Planter That Will Last For Years
How to Make a Galvanized Planter That Will Last for Years
Galvanized planters are a great way to add a touch of style and durability to your garden. They're also relatively easy to make, so you can save money by doing it yourself.
In this blog post, I'll walk you through the steps on how to make a galvanized planter that will last for years. I'll also provide some tips on how to choose the right materials and tools, and how to care for your planter so that it stays looking its best.
Materials
The following materials are needed to make a galvanized planter:
- Galvanized steel sheet metal
- Metal shears or a saw
- Measuring tape
- Level
- Pencil
- Drill
- Screws
- Rubber feet
- Soil
- Plants
Tools
The following tools are needed to make a galvanized planter:
- Metal shears or a saw
- Measuring tape
- Level
- Pencil
- Drill
- Screwdriver
- Rubber mallet
- Gloves
- Safety glasses
Instructions
- Measure and cut the sheet metal. Use the measuring tape and level to mark the sheet metal to the desired size. Then, use the metal shears or saw to cut the sheet metal to size.
- Fold the sheet metal. Fold the sheet metal in half lengthwise, making sure that the edges are aligned. Then, use the drill to drill holes through the folded sheet metal at each corner.
- Attach the rubber feet. Attach the rubber feet to the bottom of the planter using the screws. This will help to prevent the planter from sliding around.
- Fill the planter with soil. Fill the planter with soil, leaving about an inch of space at the top.
- Plant your plants. Plant your plants in the soil, spacing them evenly.
- Water your plants. Water your plants well, and then enjoy your new galvanized planter!
Tips
- When choosing galvanized sheet metal, look for a thickness of at least 22 gauge. This will help to ensure that the planter is sturdy and durable.
- If you're using a saw to cut the sheet metal, be sure to wear safety glasses.
- When drilling the holes for the rubber feet, be sure to drill them in the center of the feet. This will help to ensure that the feet are evenly spaced.
- When filling the planter with soil, be sure to use a high-quality potting mix. This will help to ensure that your plants have the nutrients they need to thrive.
- When planting your plants, be sure to water them well. This will help them to get established in their new home.
Care and Maintenance
Galvanized planters are relatively low-maintenance. However, there are a few things you can do to help keep them looking their best:
- Wipe down the planter with a damp cloth after each watering. This will help to remove any dirt or debris.
- If the planter gets rusty, you can clean it with a mild solution of vinegar and water.
- You can also apply a clear coat of sealant to the planter to help protect it from the elements.
Conclusion
Making a galvanized planter is a great way to add a touch of style and durability to your garden. It's also a relatively easy project that you can do yourself. With a little bit of time and effort, you can create a planter that will last for years to come.
DIY Galvanized Planters: A Rustic and Elegant Way to Add Beauty to Your Home
Galvanized planters are a great way to add a touch of rustic elegance to your home or garden. They're also relatively easy to make, so you can save money on store-bought planters.
To make a DIY galvanized planter, you'll need a few basic supplies:
- A galvanized bucket or tub
- A drill
- A drill bit
- Potting soil
- Plants
Once you have your supplies, follow these steps:
- Drill a few drainage holes in the bottom of the galvanized bucket or tub.
- Fill the planter with potting soil.
- Plant your favorite flowers or herbs.
- Place the planter in a sunny spot.
That's all there is to it! You now have a beautiful and rustic galvanized planter that will add a touch of elegance to your home or garden.
For more information about DIY galvanized planters, please visit Garden Wiki.
FAQ of diy galvanized planter
FAQ on DIY Galvanized Planter
Galvanized planters are a popular choice for gardeners because they are durable, rust-resistant, and can be used indoors or outdoors. If you are considering making a DIY galvanized planter, here are some of the most frequently asked questions:
1. What is galvanized steel?
Galvanized steel is steel that has been coated with a layer of zinc. This coating protects the steel from rust and corrosion, making it ideal for use in outdoor applications.
2. Is galvanized steel safe for plants?
Yes, galvanized steel is safe for plants. The zinc coating does not leach into the soil or water, and it does not harm plants.
3. What are the benefits of using a DIY galvanized planter?
There are several benefits to using a DIY galvanized planter, including:
- Durability: Galvanized steel is a very durable material, so your planter will last for many years.
- Rust resistance: The zinc coating prevents rust, so you don't have to worry about your planter corroding.
- Versatility: Galvanized planters can be used indoors or outdoors, and they can be customized to fit any style.
- Cost-effectiveness: DIY galvanized planters are a cost-effective way to add some style to your garden.
4. How do I make a DIY galvanized planter?
There are many different ways to make a DIY galvanized planter. Here is a simple tutorial:
- Gather your materials. You will need a galvanized steel bucket, a drill, a saw, and some screws.
- Drill drainage holes in the bottom of the bucket.
- Cut a piece of wood to fit the top of the bucket.
- Screw the wood to the top of the bucket.
- Fill the planter with your favorite plants.
5. Where can I buy galvanized steel?
Galvanized steel is available at most hardware stores. You can also find it online.
Image of diy galvanized planter
5 different images of "diy galvanized planter" from Pinterest:
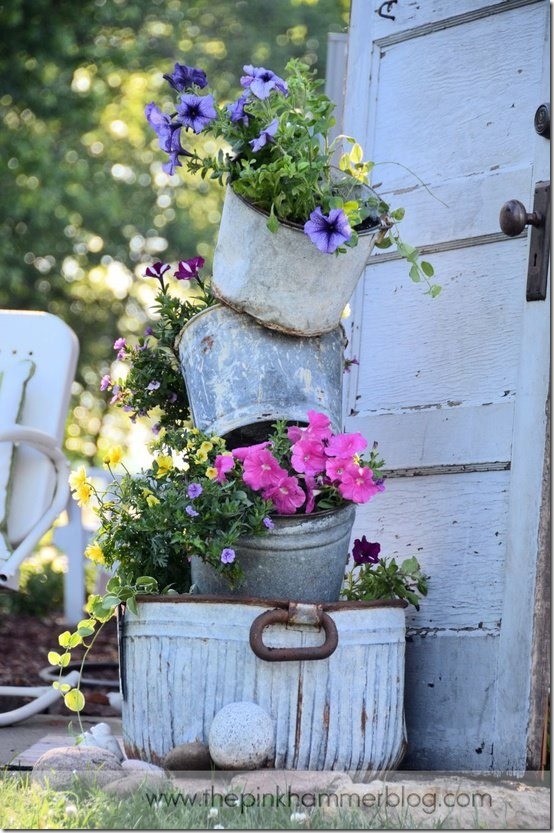
- Stacked galvanized bucket planter: This planter is made from three galvanized buckets stacked on top of each other. The buckets are drilled with holes for drainage, and then filled with soil and plants.
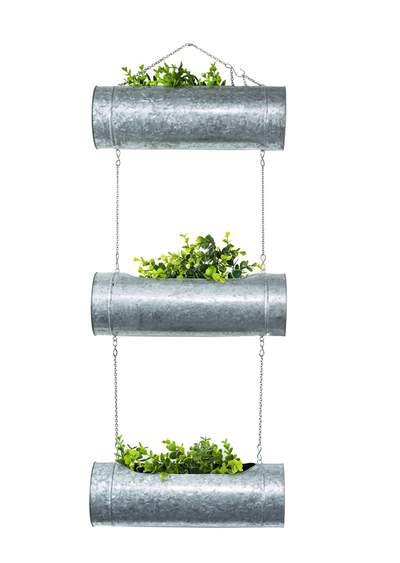
- Vertical galvanized planter: This planter is made from a galvanized pipe and some wooden planks. The pipe is cut to size and then attached to the planks. The planter is then filled with soil and plants.
- Galvanized planter with wheels: This planter is made from a galvanized bucket with some wheels attached to the bottom. This makes it easy to move the planter around.

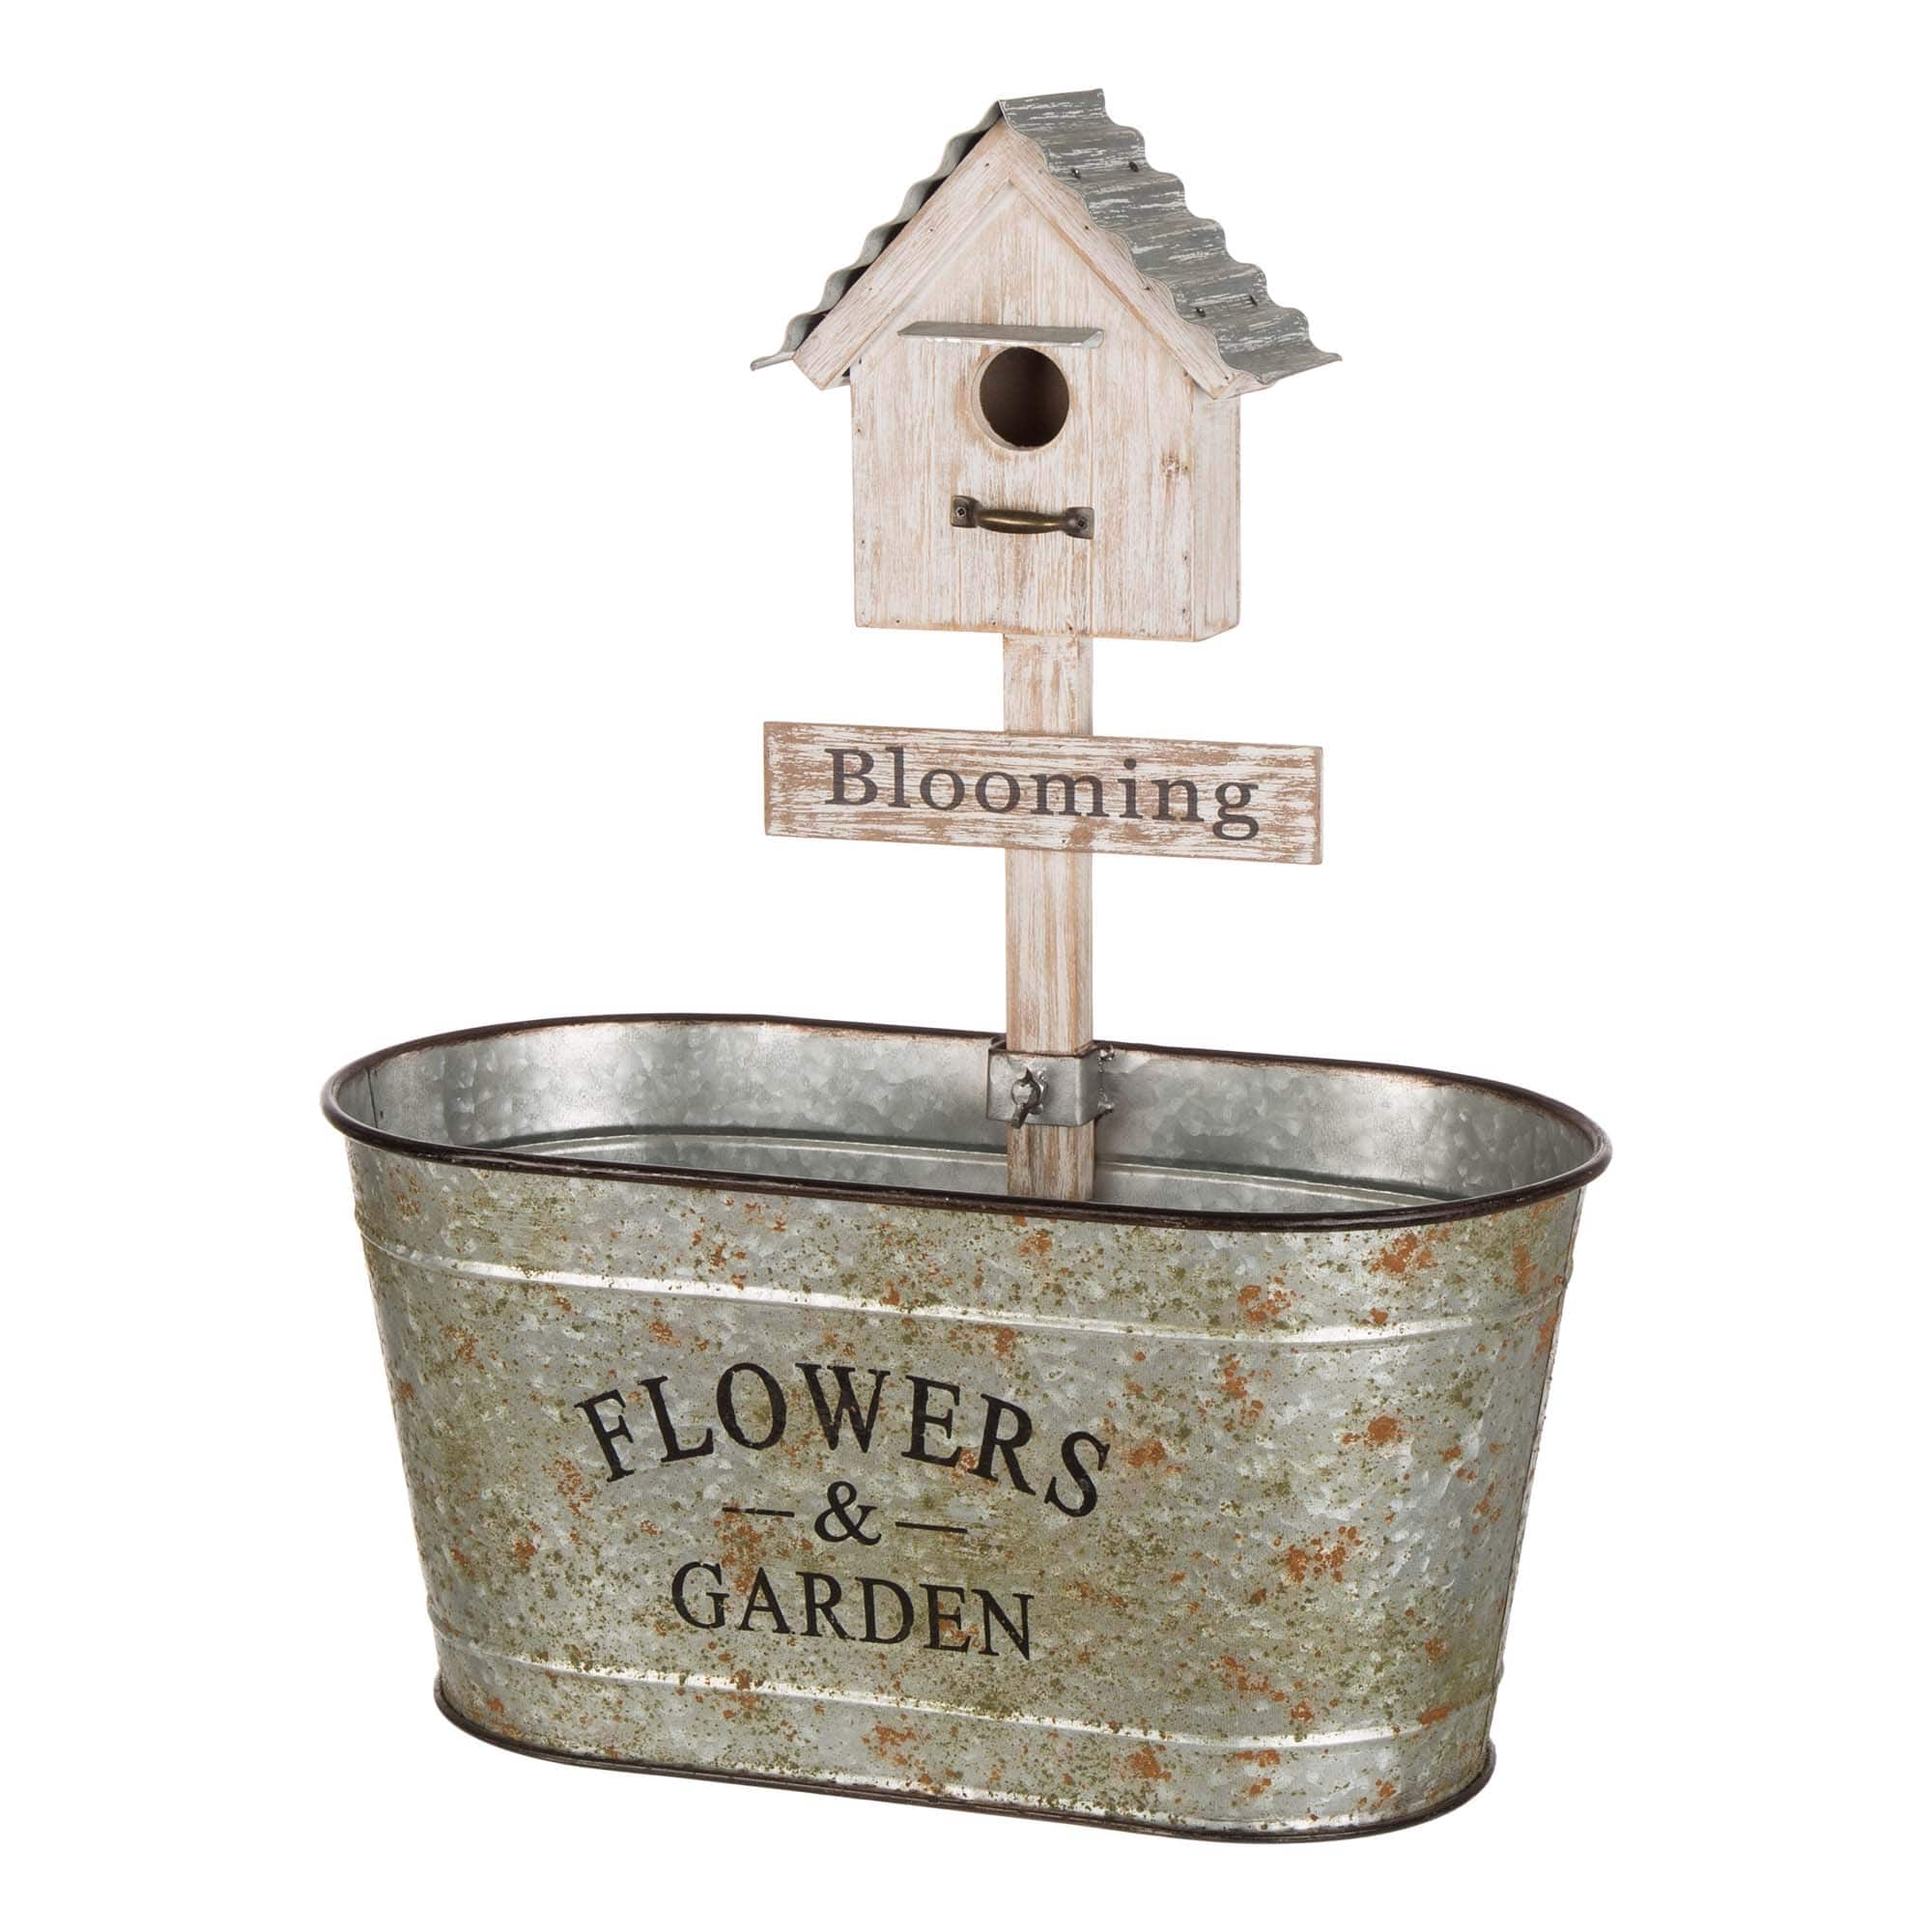
- Galvanized planter with a birdhouse: This planter is made from a galvanized bucket with a birdhouse attached to the top. This is a great way to attract birds to your garden.
- Galvanized planter with a moss roof: This planter is made from a galvanized bucket with a moss roof. This gives the planter a rustic look.

Post a Comment for "How To Make A Galvanized Planter That Will Last For Years"